Saturday, September 3, 2016

Layout dilemma

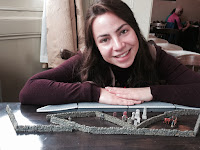
The hill and incline materials are coming together nicely. After totally divided opinions on the building materials we went with what we've got available i.e. polystyrene sheets covered with papier mache (kitchen towel and PVA). We also visited a model rail fare in Darlington as pictured (topping up our caffeine intake) where we picked up some bargains identified on our google+ wall post...

Today we collected our parcel - 75th anniversary Hornby Mallard WITH bevelled LNER which our previous mallard train was lacking causing Andrew sleepless nights. Now we are faced with a new dilemma. What era do we interpret through our model layout and which station should our layour centre around?? The problem lies in that the Duchess is LMS and majority of other locos followed the LNER route. Options we have considered...

a) Not to run the Duchess on our layout at displays. Heart breaking.
b) Squeeze in multiple geographical areas in one 00 gauge layout which reflect on LNER & LMS routes. Overly ambitious. 
c) Develop an imaginary steam heritage station on which a variety of steam trains can run. Unrealistic. 

So far option c seems to have several advantages - less pressure on reflecting on a snap shop in history, we get to create our own moment in other words, more freedom. It is a sort of compromise as we can be quite fastidious when it comes to getting things right and prefer to have a point of reference.

If anybody has any ideas or experience of layouts which celebrate the age of steam we would love to hear from you! Alternatively a station which all of these trains may have passed in an era when all of them were all of theme were active - calling all historians! Did the LNER / LMS route ever meet?

Current loco status

  • Sir Nigel Gresley
  • Mallard (x2 as we repurchased a 75th anniversary model to get the beveled LNER font)
  • Golden Plover
  • Duchess of Sutherland
  • Flying Scotsman
  • 2009 Hornby Collector Club 43209 Loco


Friday, September 2, 2016

Devil's in the detail

This afternoon and early evening was spent building the Metcalfe steam engine shed and eventually got it finished! Final result? It looks fantastic! Nikola wasn't convinced by the Metcalfe steam engine shed on first impressions at a model railway fare - thought it looked really flat and unrealistic. It may well have grown on us during the building phase or the actual product may be a more recent version of the kit, Metcalfe are known to have made a quality upgrade over the past 20+ years.

However we did add some modifications of our own to the kit. We took to acrylic, we painted the inside and tops of the chimneys, this gave them a blackened/coaled effect, exactly as a steam engine shed would have been!

This kit was easy to build, but was time consuming, with two people it took around 8 hours, so I imagine 10-12 hours would be needed if you were building this kit on your own. First off what we don't like:

  • It is card, so requires a lot of effort to avoid it looking flat, unavoidable on close inspection.
  • Metcalfe do have good instructions, but some more clarity on pretty important aspects would have been good - simple and brief is more in many cases.
  • The stress of making a total and utter mess of it all.
But what about what we do like:
  • For the money, the finish is fantastic, it also goes really well with the Hornby waiting room and booking hall;
  • The finish does indeed look 3D, really excellent;
  • The way the card fits together is super impressive, the people at Metcalfe are genius;
  • Comes with a few optional extras, and as is typical for Metcalfe they have included extra card incase you make mistakes and ruin the overall finish.
Overall overjoyed, this WON'T be our last Metcalfe card kit. 9/10!


Nails could also do with a lick of paint!


Devil's in the detail.

Thursday, September 1, 2016

Building Metcalfe bridges

Our initial idea was to build a viaduct bridge at the back of the layout for the inner most loop which inclines. I really loved the idea of being able to look through the arches to see the passenger steam trains race around the outside track loops. We chose brick to keep the building material consistent though out the layout. Unfortunately (somebody) didn't measure the bridge and the product of my hard labour was unsuitable for our steady and sensible incline. Too late to cut the legs of the viaduct and even if we did, it would be far from a 00 gauge proportion.

Solution - buy another bridge. This time we risked our layout by of picking a stone finish and my does it complement the existing brick features! I also find that the stone finish has more depth. We had the option of supporting single or double track on the bridge but in attempt ration as much space as possible for scenery we chose single track. The fact that it was going to take less assembly time was a bonus. We worked to together on this one start to finish. The end product is exceptional and we are really happy to have completed another piece for our layout. The arch gives enough clearance for a train to go through. In our layout the trains will enter a turn table after passing the arch, it will also disguise a tunnel entrance at the back of our layout. The Metcalfe sets are relatively inexpensive but you compensate for it in time, which if you're anything like me is time well spent.

Next stop double steam engine shed. As for the viaduct, I will probably use the face of it as a background feature to avoid wastage.